Setup Wireguard VPN Server
Wireguard is a modern, high-performance VPN (Virtual Private Network) protocol that aims to provide a secure and efficient way to establish encrypted connections between devices. Unlike traditional VPN protocols, Wireguard is designed to be lightweight, simple, and easy to configure. It utilizes state-of-the-art cryptography techniques to ensure privacy and security. Wireguard boasts faster connection times and lower resource usage compared to other VPN solutions. With its streamlined design and cross-platform compatibility, Wireguard has gained popularity for its ability to create secure tunnels for remote access, site-to-site connections, and privacy-enhanced browsing.
In this article we will be going through the process of hosting your own Wireguard VPN Server.
Prerequisite:
- A VPS
- Command line and sudo access to the server
- Linux or Wireguard Mobile App
Server Operations
Step 1: Install Wireguard
apt update; apt install wireguard -yStep 2: Configure the public and private keys
Create and enter the configuration directory in /etc
mkdire /etc/wireguard
cd /etc/wireguard
We run the following command to generate both private and public keys
umask 077; wg genkey | tee privatekey | wg pubkey > publickeyStep 3: Create configuration files
We will create wg0.conf and paste the following:
[Interface]

## My VPN server private IP address ##
Address = 192.168.100.1/24
MTU = 1460 #For GCP Servers

## My VPN server port ##
ListenPort = 41307

## VPN server's private key i.e. /etc/wireguard/privatekey ##
PrivateKey = 8MWSthu6+ojTNAJSHFNPkpYxcdkVbKZo5EzUZWERbGw=
SaveConfig = false
#Firewall rules for Wireguard
PostUp = iptables -A FORWARD -i wg0 -j ACCEPT; iptables -t nat -A POSTROUTING -o <Network interface Name> -j MASQUERADE
PostDown = iptables -D FORWARD -i wg0 -j ACCEPT; iptables -t nat -D POSTROUTING -o <Network interface Name> -j MASQUERADE
NOTE: Remember that if you have firewall in your Infra or you have hosted the Server on Public such as GCP/AWS, you will need to open the port configured which is "41307" in our case
Step 4: Enable IP forwarding
For wireguard to work, we have to enable IP forwarding on OS level using sysctl as follows:
echo 'net.ipv4.ip_forward=1' | sudo tee -a /etc/sysctl.d/10-wireguard.conf; sysctl -p /etc/sysctl.d/10-wireguard.conf; sysctl -a | grep 'net.ipv4.ip_forward'Step 5: Enable and Start Wireguard service
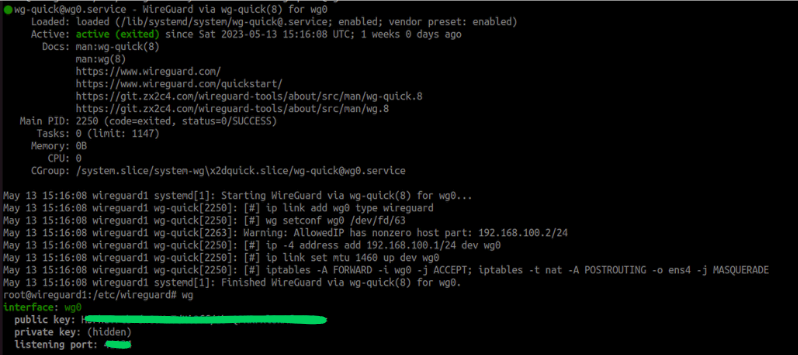
Start and enable the service using the command:
systemctl enable --now wg-quick@wg0